If you want to know how to design a room like a pro, here’s a foundational truth you can’t ignore: great design starts long before you ever pick up a paint swatch. It’s all about the prep work—defining your vision, getting real about the room’s practical needs, and gathering inspiration with a clear goal in mind.
Defining Your Vision and Setting the Stage
Before you even think about moving furniture, the most important work happens. Building this solid foundation for your project is what saves you from guesswork and costly mistakes down the road. This initial phase is where you turn those fuzzy ideas into a concrete, actionable plan.
It all starts by getting crystal clear on the room's core purpose and the atmosphere you want to create. This step ensures that every decision you make later—from the sofa you choose to the light fixtures you hang—all works together.
Clarify the Room's Core Purpose
First, you have to ask the most important question: What is this room for? Seriously, the answer changes everything. A living room designed for quiet reading and intimate conversation is going to look and feel completely different from one built for hosting loud, sprawling movie nights with the whole family.
Get specific about the activities. Will you need durable, stain-resistant fabrics to stand up to kids and pets? Is ample storage a non-negotiable for hiding clutter? How many people do you need to seat comfortably on a regular basis?
Next, think about the feeling you want the room to evoke. Use descriptive words to guide you. Are you aiming for a space that feels:
- Calm and serene? This probably means leaning into neutral colors, soft textures, and uncluttered surfaces.
- Energizing and vibrant? You might be thinking about bold patterns, high-contrast colors, and dynamic artwork.
- Cozy and inviting? This points toward warm lighting, plush textiles, and comfortable, oversized furniture.
Nailing down both function and feeling gives you a powerful filter for all your future design choices. It makes it so much easier to say "yes" or "no" to ideas and purchases along the way.
Gather Inspiration with Intent
Once you have a clear purpose, you can start gathering inspiration in a much smarter way. It’s way too easy to get lost in the endless scroll of beautiful images on Pinterest and Instagram. The key is to shift from just passively saving things to actively analyzing them.
Instead of just pinning every room you like, start looking for the patterns. As you build your collection of 30-40 images, really study them for common threads. Do you consistently gravitate towards rooms with dark, moody walls? Are you drawn to furniture with clean lines and simple silhouettes? Do you notice a specific material, like warm wood or brushed brass, showing up over and over again?
"Your inspiration board isn't just a collection of pretty pictures; it's a data set revealing your subconscious design preferences. Analyze it to find the common threads in color, texture, and mood that will define your unique style."
This analytical approach helps you boil down a huge range of images into a tangible design direction. If you need a place to start, checking out these beautiful living room ideas can help spark some creativity.
Handle the Practical Essentials
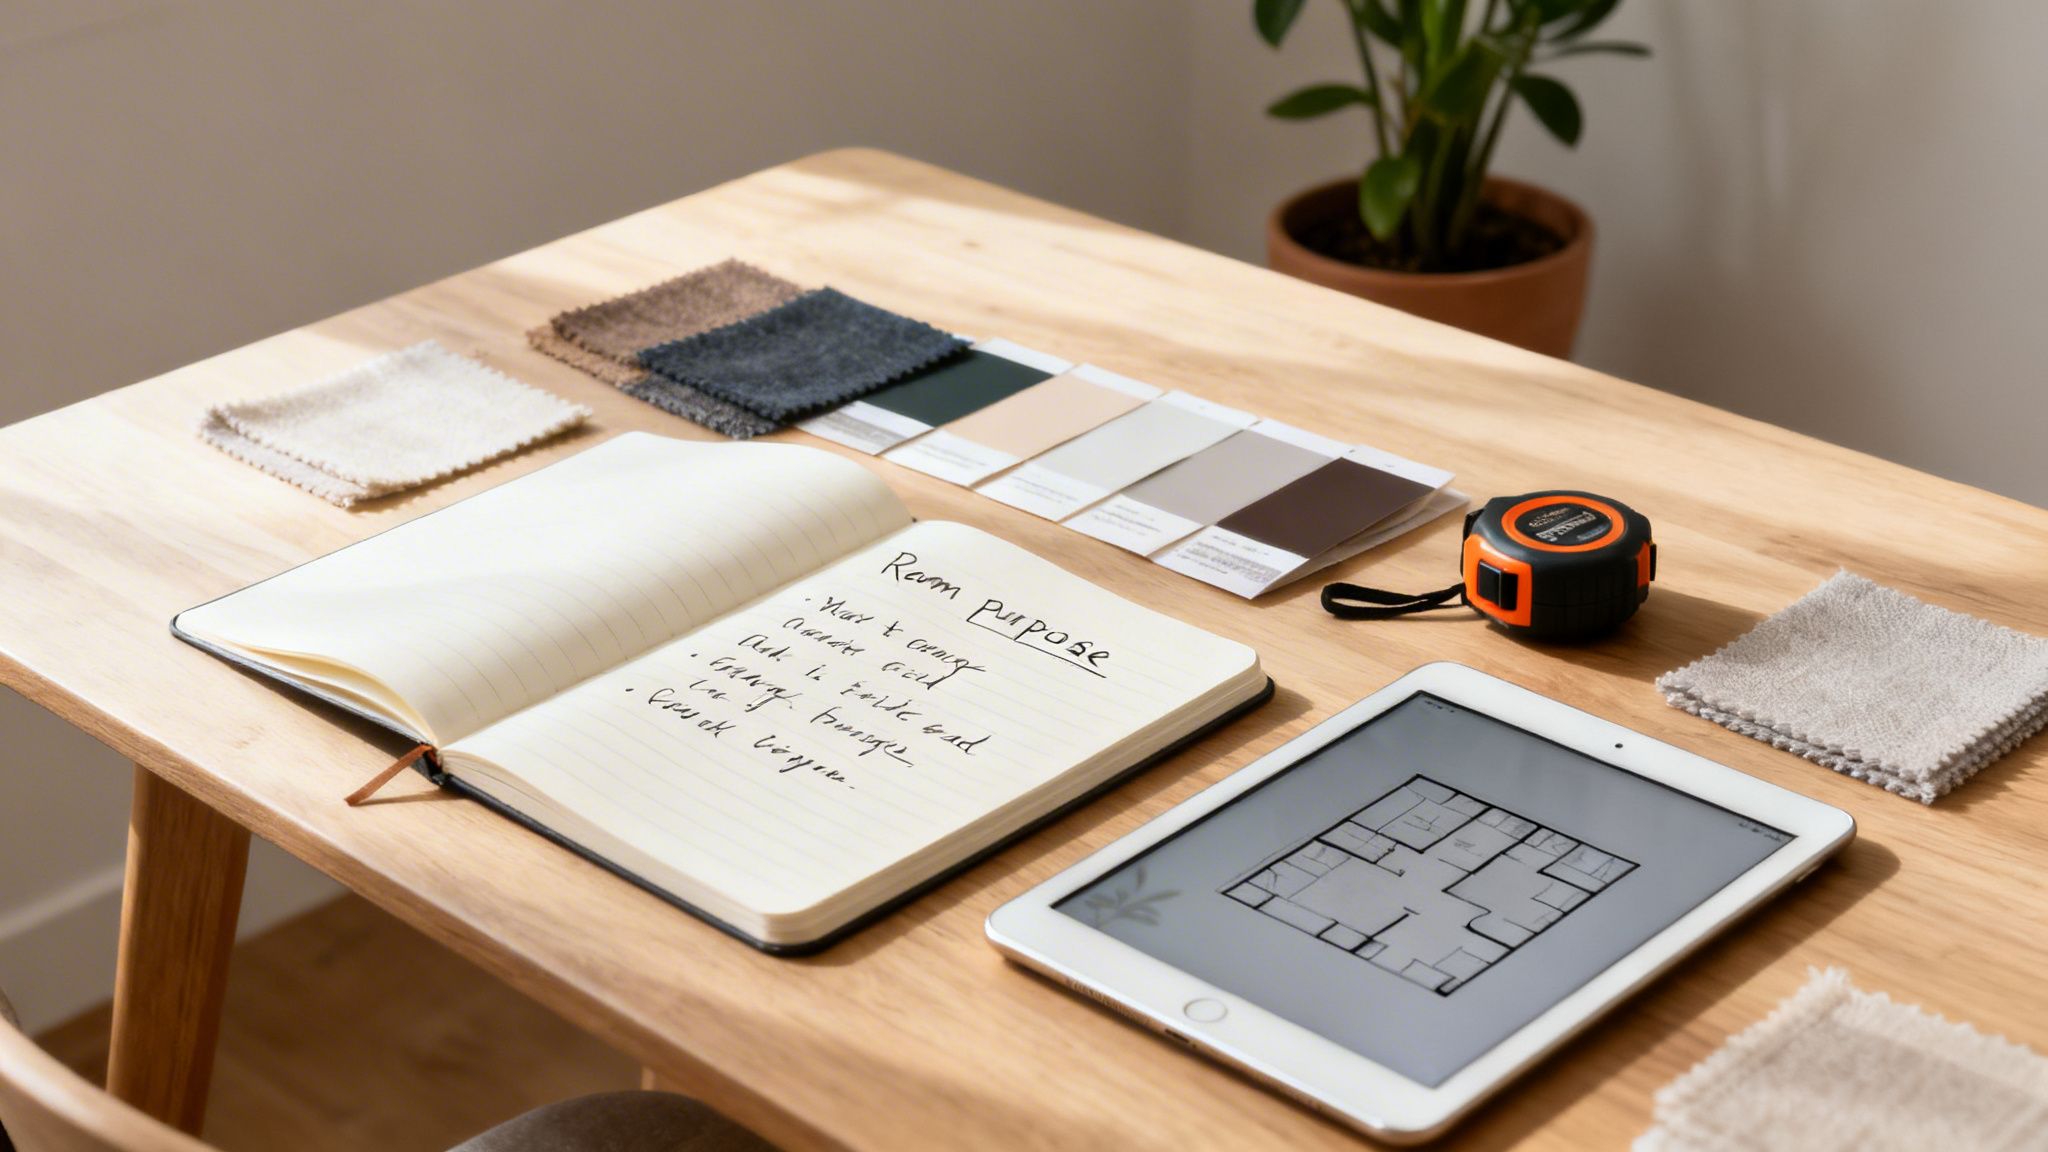
Finally, it’s time to ground your vision in reality with two non-negotiable steps: measuring and budgeting. I can’t stress this enough—skipping this stage is the fastest way to get frustrated.
1. Measure Everything Accurately Grab a tape measure and sketch out your room. You don't need fancy software; graph paper works just fine. Note the dimensions of the entire room, and be sure to include the locations and sizes of windows, doors, and any unmovable features like a fireplace or built-ins. Having this simple floor plan is a lifesaver when you start shopping for big-ticket items like sofas and rugs, guaranteeing they'll actually fit.
2. Create a Realistic Budget Decide on a total amount you're comfortable spending, then break it down by category. This is where you prioritize what truly matters to you. Would you rather invest in a high-quality, comfortable sofa and save on accent tables? Or is that custom lighting the one thing that will truly make the room for you? A clear budget keeps you from overspending and forces you to be intentional about where your money will make the biggest impact.
Arranging Your Space for Flow and Function
A room’s layout is its silent director. It guides how you move, interact, and ultimately feel in the space. Before you even think about a specific sofa or paint color, you need to get the space planning right. This is the architectural skeleton that holds your entire design together, ensuring it's not just beautiful but also works for your real life.
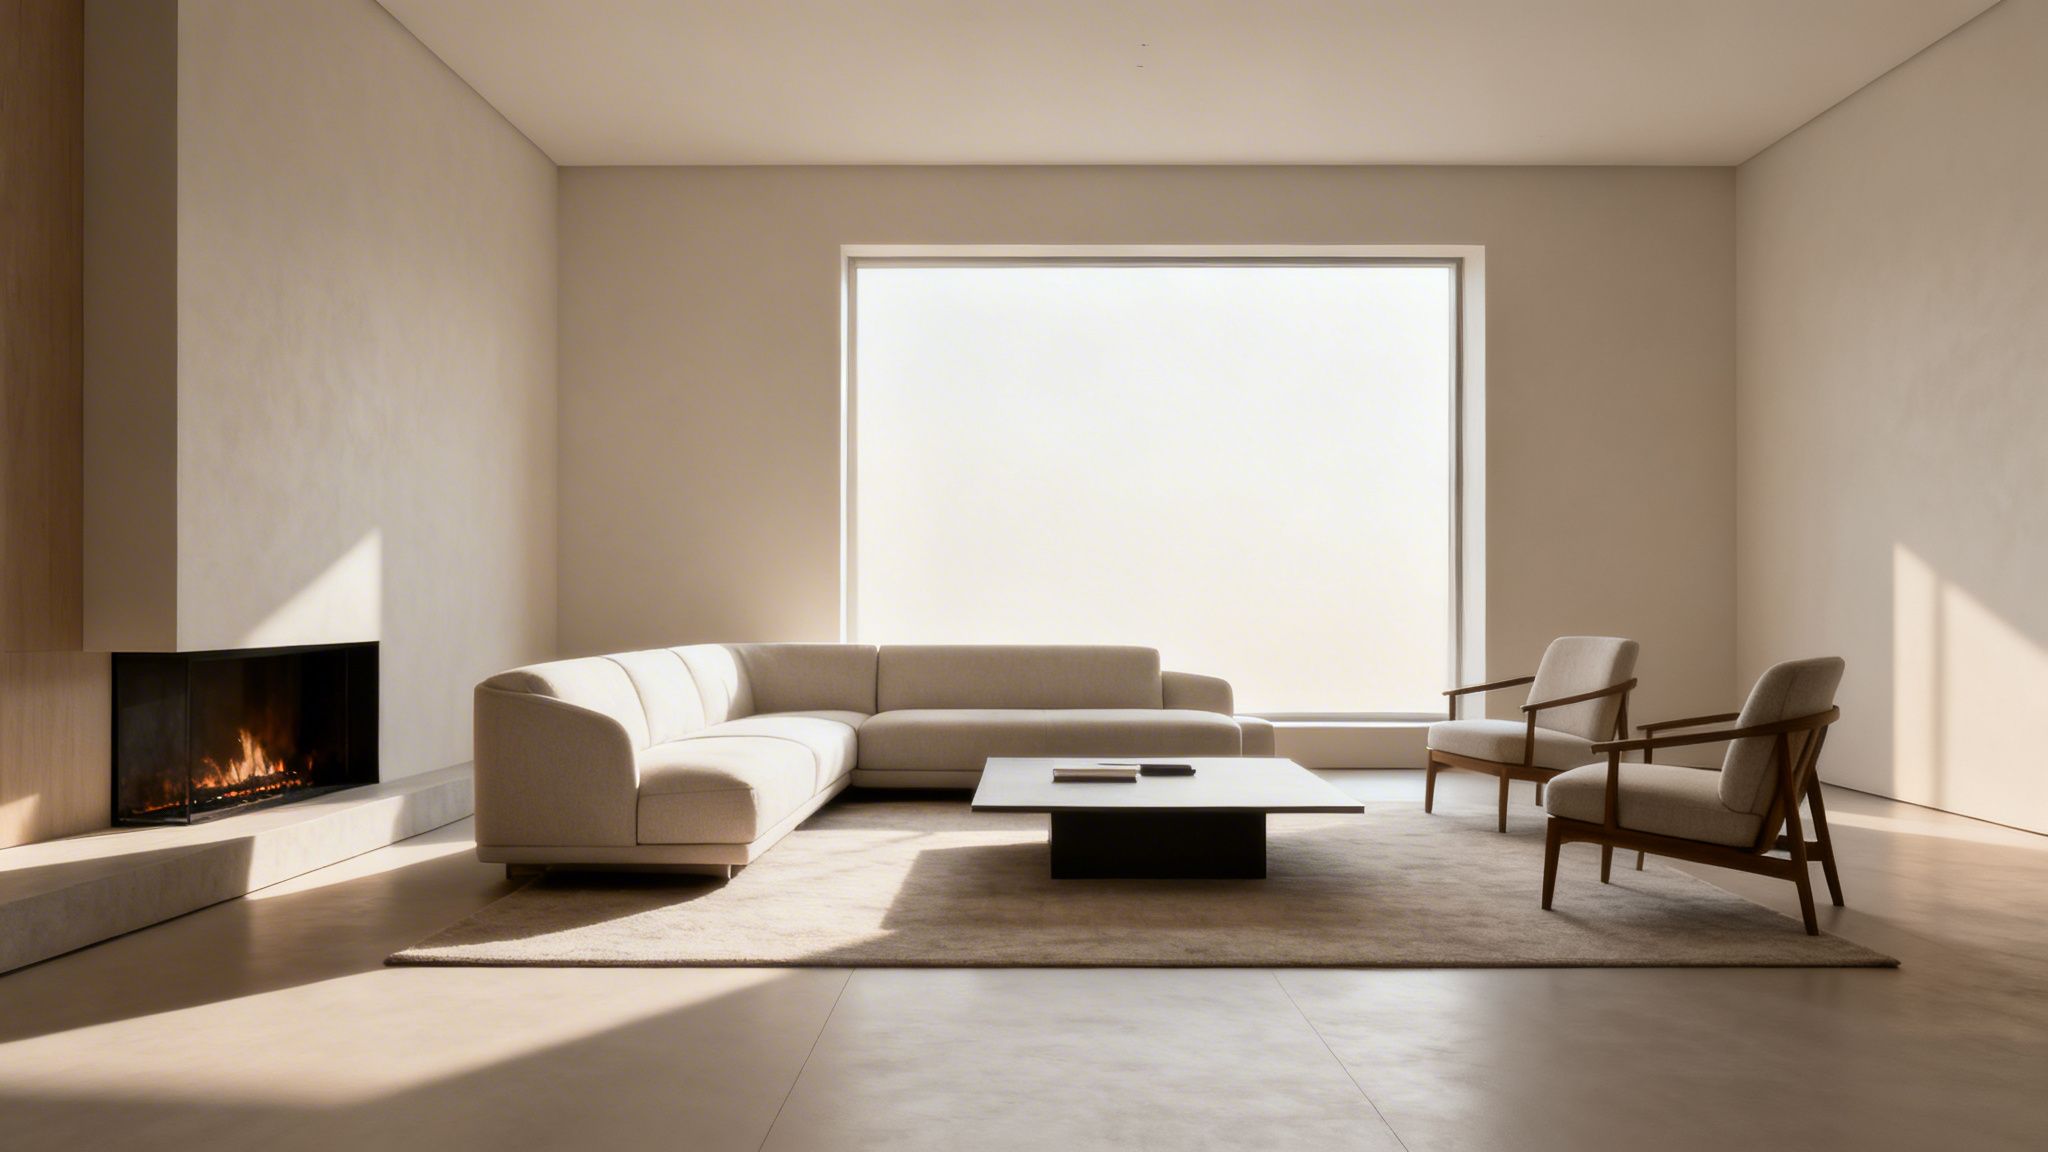
The first move is always to figure out the room's natural focal point. This is the feature your eye is drawn to the moment you walk in—it might be a grand fireplace, a wall of windows with a killer view, or even a blank wall you've designated for a large piece of art. Once you've found it, your furniture should honor it, not fight it.
Find and Emphasize Your Focal Point
Every room either has a star or needs one. Don't work against the room's built-in architecture. If you have a beautiful set of French doors, orient the main seating area to enjoy the view. If a fireplace is the heart of the room, arrange furniture around it to create a cozy, inviting atmosphere.
A classic and highly effective strategy is to position your largest piece of furniture—usually the sofa—to face this focal point. This single decision immediately gives the room a sense of purpose and makes every other placement choice much easier.
This desire to create thoughtful, well-designed homes isn't just a niche interest; it's a massive global trend. The interior design market grew from $120.4 billion in 2021 and is projected to hit $153.85 billion by 2026. People are investing more in making their spaces both functional and beautiful, as detailed in this industry report.
Design for Conversation and Connection
A living room's main job is to bring people together. To do that well, you need to create distinct conversational zones where people can interact comfortably without having to shout across the space. The goal is to arrange seating in a way that feels intimate and encourages dialogue.
Imagine an invisible circle or square connecting your seating pieces. In a larger room, you might have one main zone anchored by a sofa and two armchairs, plus a smaller nook with two chairs and a side table for quieter chats. In a smaller space, one well-arranged zone is all you need. The trick is making sure the pieces are close enough for easy conversation but not so close that things feel cramped.
A great layout doesn't just fill a space; it directs human behavior. By creating clear pathways and intimate seating zones, you're crafting an environment that naturally encourages both movement and connection.
This concept is crucial for multi-purpose rooms. For example, if you're trying to combine a workspace and a guest area, you'll find some excellent inspiration in these smart home office ideas that masterfully balance work and comfort.
Master Movement With Clear Traffic Paths
One of the most common layout mistakes is forgetting about traffic flow. You should be able to move through a room without weaving around furniture or bumping into sharp corners. The paths from one doorway to another need to be clear and unobstructed.
As a rule of thumb, make sure major walkways are at least 30-36 inches wide. This gives people enough room to pass through comfortably. Think about the natural lines of travel in your home—from the hallway to the sofa, or from the living room to the kitchen door. Keep those lanes clear.
Interestingly, pulling furniture away from the walls, a technique known as "floating," can actually make a room feel bigger and dramatically improve its flow.
Get the Spacing Just Right
The secret sauce that separates an amateur layout from a professional one often comes down to the inches. These small distances have a huge impact on how comfortable and usable a room feels.
Here’s a quick guide to help you nail those crucial measurements. Think of it as a cheat sheet for achieving a balanced, comfortable, and professionally designed feel in any room.
Essential Furniture Spacing Cheat Sheet
| Layout Element | Ideal Measurement | Why It Matters |
|---|---|---|
| Coffee Table to Sofa | 14–18 inches | Close enough to set down a drink, but far enough for comfortable legroom. |
| Between Seating | Under 8 feet | Keeps conversation comfortable without anyone needing to raise their voice. |
| Walkway/Traffic Lane | 30–36 inches | Ensures easy, unobstructed movement through the space. |
| Area Rug Anchor | Front legs on rug | At a minimum, this anchors the seating area and defines the zone. |
| Art Height (Center) | 57–60 inches from floor | Positions the artwork at the average human eye level for optimal viewing. |
| Furniture to Wall | 3+ inches | "Floating" furniture away from the walls creates a sense of airiness. |
Paying attention to these small details ensures your layout isn't just visually appealing—it's also a genuine pleasure to live in. It's these thoughtful touches that truly make a house feel like a home.
Building a Cohesive Color and Materials Palette
If the layout is the skeleton of your room, then the colors and materials are its soul. This is where you set the mood, tell a story, and make the space feel deeply personal.
So many people get stuck here, paralyzed by the fear of choosing the "wrong" color or creating a chaotic mess. The trick is to start with a proven framework that brings order to your choices. From that foundation, you can start layering in textures that add a much-needed sensory appeal.
The Foundation: The 60-30-10 Rule
There's a reason this one's a classic. The 60-30-10 rule is an interior designer's best friend and a fantastic starting point for any project. It’s a simple, foolproof ratio that helps you balance your color choices so the room feels harmonious, not overwhelming.
Here’s the simple breakdown:
- 60% Main Color: This is your dominant shade, the one that anchors the space. Think walls, a large sofa, or a significant area rug. It sets the overarching tone.
- 30% Secondary Color: This color supports the main one, adding interest without competing for attention. It’s perfect for accent chairs, curtains, or even a feature wall.
- 10% Accent Color: Now for the fun part. This is your pop of personality, used sparingly on things like throw pillows, artwork, and small decor. It's also the easiest element to swap out when you're ready for a change.
Let’s say you’re after a calm, nature-inspired living room. You could go with 60% soft beige on the walls, 30% a deep forest green sofa, and 10% warm ochre in your art and pillows. For more examples of balanced palettes in action, our guide on beautiful minimalist living room ideas is a masterclass.
Layering Textures for Depth and Interest
Even with a perfect color scheme, a room filled with flat, uniform surfaces will feel cold and one-dimensional. Texture is the secret ingredient that adds warmth, complexity, and a tactile quality that truly finishes a space.
The goal is to create a dynamic interplay between different materials. Think about how you can mix and match to create contrast.
- Soft & Cozy: A chunky wool throw, velvet pillows, a high-pile rug.
- Smooth & Cool: A marble coffee table, polished metal fixtures, a sleek leather chair.
- Natural & Raw: A live-edge wood table, linen curtains, woven jute baskets.
The most compelling rooms engage more than just the eyes. By layering a variety of textures—from the roughness of linen to the smoothness of metal—you create a sensory experience that makes a space feel truly lived-in and thoughtfully curated.
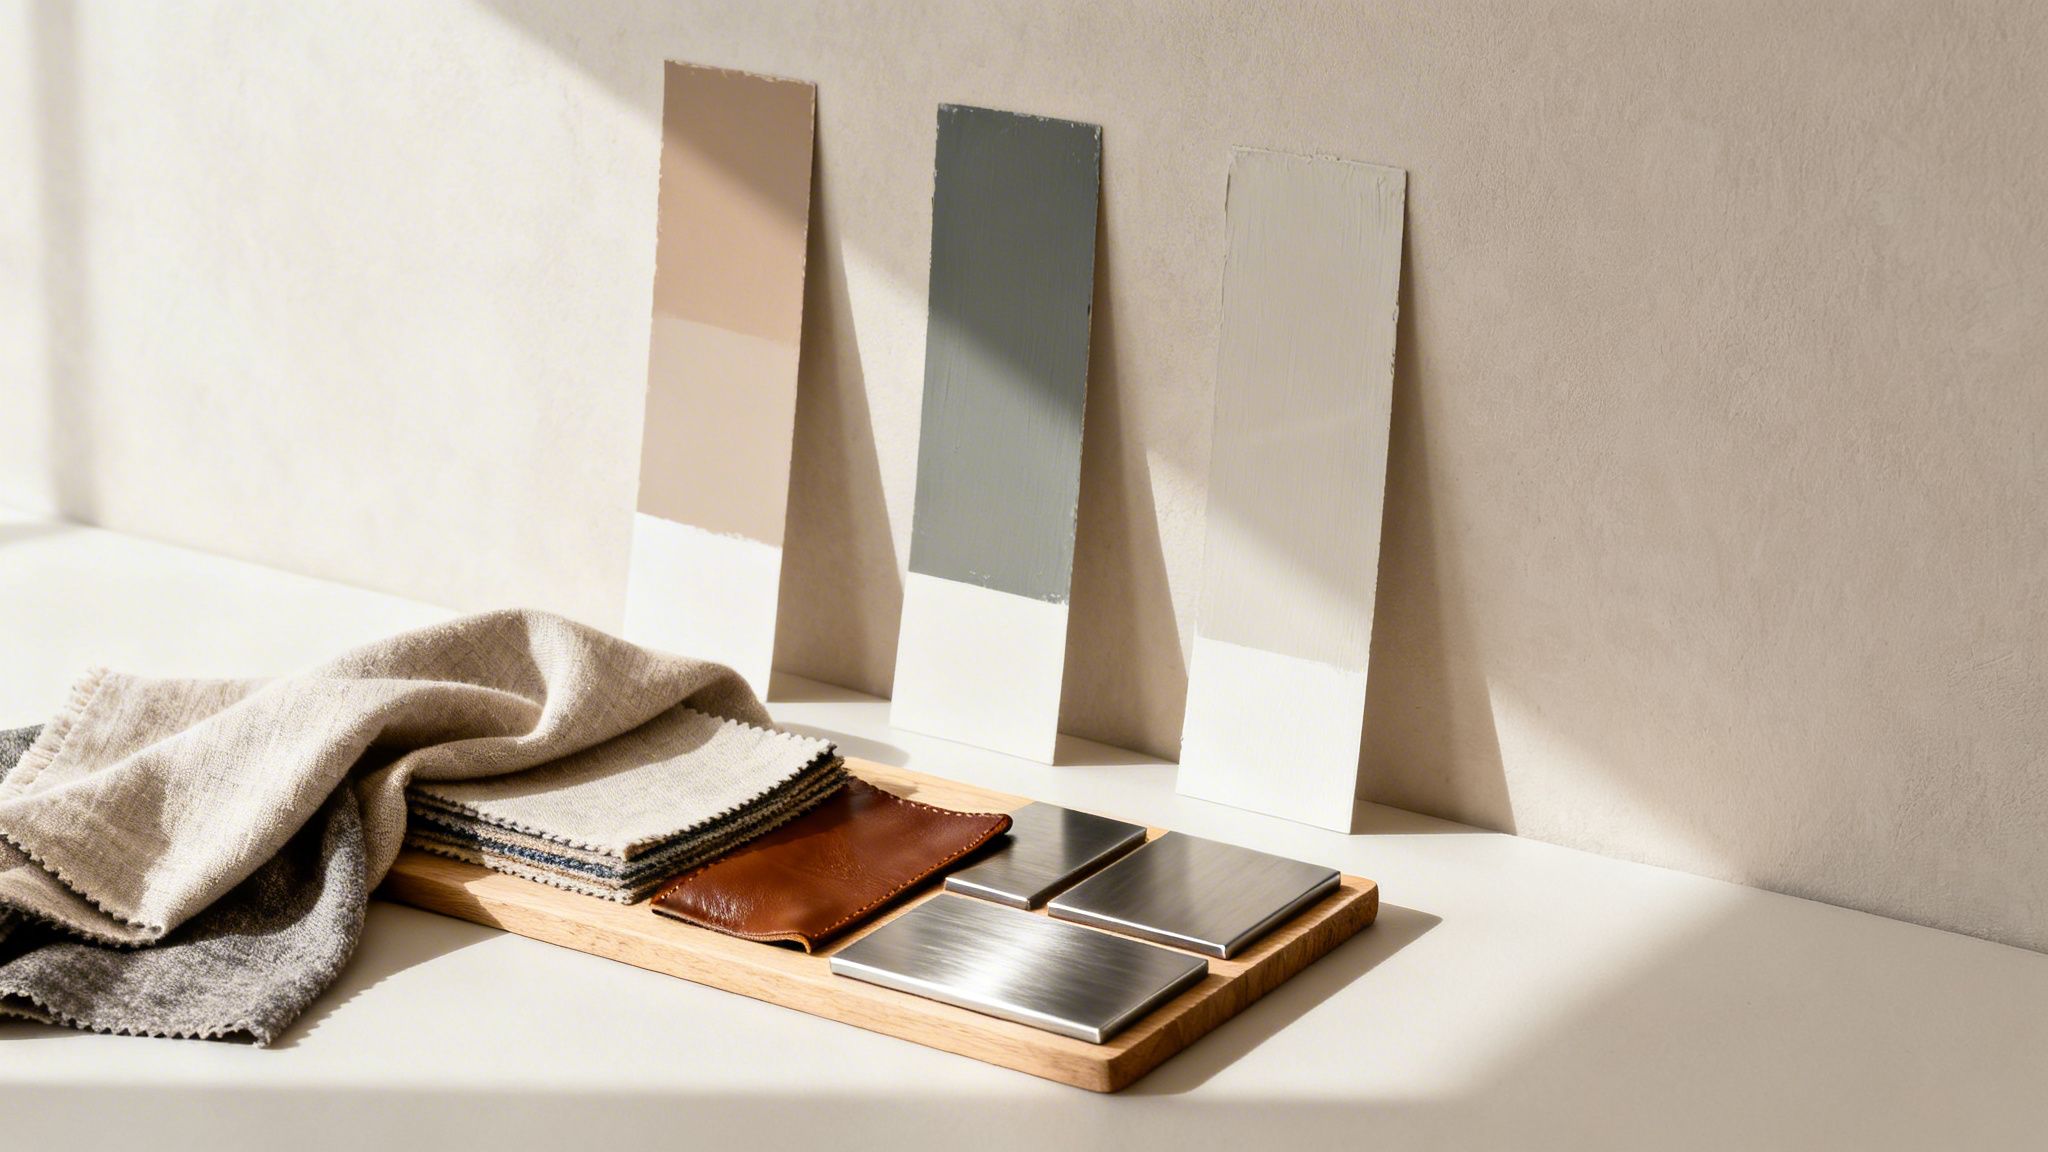
The Critical Step: Always Sample in Your Space
If you take only one piece of advice from this section, let it be this: never commit to a color or material based on how it looks in a store or on a screen.
Lighting is everything. A paint chip that looks like the perfect greige under harsh fluorescent store lights might turn lavender in your north-facing living room. The only way to know for sure is to test it in its final destination.
Before you make any final calls, bring samples home.
- Paint Swatches: Get sample pots and paint large boards (at least 2x2 feet). Move them around the room at different times of the day to see how the color shifts in morning light, afternoon sun, and artificial light at night.
- Fabric Samples: Drape fabric swatches over the furniture they’ll be on. How does the texture catch the light? How does it look next to your paint choice?
- Material Samples: For flooring, tile, or countertops, get physical samples. Place them on the floor or counter to see how they interact with the cabinets and walls.
This final quality check takes a little extra effort, but it's the surest way to prevent expensive mistakes and guarantee the vision you've planned is the one you actually get.
Crafting the Perfect Mood with Layered Lighting
More than any other element, lighting sets the entire mood of a space. It’s the secret ingredient that can make a cramped room feel spacious or a cavernous one feel cozy and intimate. Getting it right isn't about finding one perfect fixture; it's about building a flexible, layered system.
A professionally designed room never relies on a single overhead light. Instead, it weaves together three distinct types of lighting—ambient, task, and accent—to create a functional and inviting atmosphere. This approach gives you total control over the vibe, from bright and busy mornings to soft, relaxing evenings.
The Three Layers of Light Explained
To design rooms that truly feel special, you have to think like a lighting designer. That means viewing light as a tool for both practicality and artistry. Each layer you add has a specific, crucial job to do.
Ambient Lighting: This is your foundation—the general, all-over illumination that substitutes for natural daylight. Think of ceiling fixtures like chandeliers, flush mounts, or recessed lighting that cast a broad, even glow across the entire room.
Task Lighting: This is all about function. It's the focused light you need for specific activities, like a desk lamp for working, a floor lamp by your favorite reading chair, or under-cabinet strips in the kitchen. Good task lighting prevents eye strain and just makes life easier.
Accent Lighting: Here’s where you add the drama and style. Accent lights are used to highlight specific features you want to show off, whether it's a beautiful piece of art, a textured wall, or a unique architectural detail. Track lighting, picture lights, and uplights are perfect for this.
When you combine these three layers, your room is ready for anything, from a brightly lit family game night to a softly illuminated dinner party. This sophisticated approach is a global priority in design. In fact, Europe currently leads the world, holding 27.80% of the $148.5 billion global market, with the Asia-Pacific region not far behind. You can dig deeper into these global interior design market trends to see how design investment is spread worldwide.
Choosing Fixtures and the Right Light Temperature
Once you've got the layers figured out, you can start picking fixtures that not only do the job but also enhance your design style. A striking chandelier, for example, provides great ambient light while also acting as a sculptural centerpiece. A sleek, minimalist track light can pull double duty, offering both ambient and accent light depending on where you aim the heads.
But the fixture is only half the story. The color temperature of the light bulb itself is absolutely critical. Measured in Kelvins (K), it dramatically affects how a room feels.
Warm Light (2700K - 3000K): This is that cozy, inviting, yellowish-white glow we all love. It’s perfect for living rooms, dens, and bedrooms—anywhere you want to encourage relaxation. Check out our collection of inspiring bedroom ideas to see how warm lighting can create a truly restful sanctuary.
Cool Light (3500K - 4500K): This gives off a bright, neutral white light that’s much closer to natural daylight. It’s fantastic for task-oriented spaces like kitchens, home offices, and bathrooms where you need clarity and focus.
"A great lighting plan is the ultimate form of control over a room's atmosphere. Installing dimmers on your main light sources is the single most effective and affordable upgrade you can make, turning a one-note space into a dynamic environment."
The Final Touch: Dimmers Are Non-Negotiable
The last piece of the lighting puzzle is all about control. Simply put, installing dimmer switches is a must for any thoughtful lighting scheme. By putting dimmers on your ambient and accent layers, you gain the power to instantly shift the room's intensity and mood.
Just imagine turning down the overhead ambient lights for a movie night, while leaving a single task lamp on for someone who's reading. That’s the kind of control that elevates a room from just being lit to being beautifully and intelligently illuminated. It makes your design more versatile and, ultimately, much more enjoyable to live in.
Bringing Your Vision to Life with AI Design Tools
So you’ve done your homework—the measurements are taken, the mood board is set, and you have a solid plan. But what if you could actually see your ideas in the space before you lift a paintbrush or buy a single piece of furniture? This isn't science fiction anymore. AI design tools are here, acting like a savvy design assistant that lets you experiment, tweak, and perfect your vision with zero risk.
Imagine snapping a quick photo of your room as it is right now—clutter and all. In seconds, an AI can digitally empty it, giving you a clean slate that honors your room's exact dimensions and unique lighting. This is where the fun really begins.
Instantly Prototype Different Styles
One of the best things about working with a tool like RoomStudioAI is the speed. You can take that blank canvas and instantly apply whole design aesthetics with a click, generating photorealistic concepts that show you exactly how a style feels in your room.
Not sure if you’re leaning more Japandi or Industrial? Just try them both.
- Modern: See your space decluttered with clean lines and a simple, neutral palette.
- Japandi: Instantly feel the calm of Scandinavian function blended with Japanese minimalism.
- Industrial: Visualize how exposed brick, metal accents, and raw textures would look.
This kind of rapid-fire visualization is a game-changer. It helps you quickly zero in on a direction you genuinely love by comparing completely different concepts side-by-side.
From Rough Sketch to Realistic Render
We've all been there. You have a brilliant layout idea scribbled on a napkin, but trying to explain it to a partner or contractor is another story. This is where sketch-to-render technology steps in.
You can upload a simple drawing of your floor plan, and the AI interprets it, transforming your rough lines into a fully furnished, photorealistic image. It’s an incredibly powerful way to bridge the gap between an idea in your head and a concrete visual that gets everyone on the same page.
AI design tools are making professional-grade visualization accessible to everyone, no complex software skills required. It’s less about making pretty pictures and more about making confident decisions.
While the commercial design sector often drives new trends, the rise of hybrid work is blurring the lines between home and office. This has sparked a huge demand for adaptive layouts and a growing focus on wellness-oriented materials, which are expected to add a significant 0.8% to the market's growth.
Using Visual Search to Shop Your Look
Ever see a chair in a design rendering and think, "I want that chair"? AI-powered visual search makes finding it (or something very similar) surprisingly easy. The tool can analyze the furniture in your generated designs and then pull up shoppable items from online retailers that match the style.
This "shop the look" feature turns your final design from a static image into an actionable shopping list, massively simplifying the often-overwhelming sourcing process.
This infographic shows the three essential layers of a great lighting plan.
 By combining ambient, task, and accent lighting, you create depth, function, and mood, making the whole room feel more intentional and complete.
Collaborate and Finalize with Confidence
Designing a space is rarely a solo project. AI tools make collaboration a breeze by letting you share concepts with a private link. You can gather feedback from family or clients and make adjustments without endless back-and-forth emails. It builds consensus and ensures the final outcome is one everyone loves.
Ultimately, these tools give you the freedom to be bold. You can test that daring color, try an unconventional layout, or explore a style you were never sure about—all without any real-world consequences. It makes the entire design process more creative, more collaborative, and a lot more fun.
A Few Common Room Design Questions, Answered
When you’re staring at an empty room, a few questions always seem to pop up. Even seasoned designers hit these common sticking points. Let's walk through some of the most frequent challenges people face and get you some clear, practical answers.
Where on Earth Do I Start When Designing a Room from Scratch?
The endless options can be completely overwhelming. Before you even think about paint swatches or browsing for sofas, the best place to start is with function and feeling.
First, ask yourself: what is this room’s real job? Is it a living room meant for quiet evenings with a book, or is it the go-to spot for loud, fun movie nights with the whole family? Get really specific about the activities that will happen here, how many people it needs to hold, and any absolute must-haves, like hidden storage.
Next, how do you want to feel in this space? Jot down a few words. "Calm and serene"? "Energizing and creative"? "Cozy and intimate"? This emotional direction becomes your north star, guiding every choice you make, from the texture of a throw blanket to the warmth of a lightbulb. Once you nail down the room's purpose and its mood, the rest of the decisions have a solid foundation to stand on.
How Can I Make My Small Room Feel Bigger?
This is the classic design dilemma, and thankfully, it's more about smart tricks than actual magic. The goal is to fool the eye by playing with light and making strategic choices with your furniture.
A few tactics have never failed me:
- Go Monochromatic: Using a light, cohesive color palette for the walls, ceiling, and even your larger furniture pieces helps blur the room's edges. This little trick makes the whole space feel more open and airy.
- Let the Sun In: Heavy, dark drapes are a small room’s worst enemy. Swap them for sheer curtains, simple blinds, or shades that let as much natural light as possible flood the room. Light is your best asset.
- Use Mirrors Strategically: It’s a trick as old as time for a reason. A large, well-placed mirror doesn't just reflect light; it reflects the view, creating a genuine illusion of depth and doubling the sense of space.
- Show a Little Leg: Opt for furniture that’s lifted off the ground—think sofas with tall feet or console tables with slender legs. Being able to see the floor underneath makes any room feel less crowded and more expansive.
A common mistake I see is people trying to cram a lot of tiny furniture into a small room. Ironically, using a few larger, appropriately scaled pieces often makes the space feel far less cluttered and much more grand.
What's the Secret to Mixing Different Design Styles?
Successfully blending two distinct styles—say, modern and rustic—is all about finding a common thread that ties them together. If you just throw things in a room without a plan, you end up with chaos, not a cool, eclectic vibe.
A great way to approach this is with the 80/20 rule. Pick one style to be the star, making up about 80% of the room. This will be your dominant look, seen in big-ticket items like your sofa and the overall color scheme. Then, you can sprinkle in the second style in the remaining 20% through smaller accents—a cool light fixture, a unique side table, or a piece of art.
The real key to making it all work is consistency. Find a single element to repeat across the different pieces. It could be a shared color, a specific wood tone, or a metal finish like brushed brass that appears on both your modern lamp and the hardware of your rustic media console. This creates a subtle visual connection that helps the two styles have a friendly conversation.
How Do I Choose the Right Size Rug for My Living Room?
This is, by far, the most common mistake I see: a rug that’s way too small. A tiny "postage stamp" rug floating in the middle of your floor just makes the whole room look smaller and your furniture feel like it's drifting apart.
The rule is actually pretty simple: your rug needs to be big enough to anchor the main seating area. At the very least, the front legs of your sofa and any armchairs must be sitting comfortably on the rug. This simple move defines the conversation zone and makes the entire space feel grounded and pulled together.
For that truly polished, professionally designed look, you’ll want a rug that's large enough for all the furniture in the seating group to sit entirely on top of it. A good rule of thumb is to leave about 18 inches of bare floor showing between the edges of the rug and the walls. Always, always measure your space and your furniture layout before you go shopping.
Ready to stop guessing and start visualizing? With RoomStudioAI, you can upload a photo of your room and see your design ideas come to life in seconds. Experiment with different styles, test layouts, and find the perfect look with confidence. Start your design journey today.
Ready to redesign your space?
Try our AI interior design tool and see your room transformed in seconds.
Try Free Design

