Ever stared at a room, convinced it could be something more, but couldn't quite picture it? It's a common roadblock. For a long time, professional interior design felt like a luxury, and turning a vague idea into a tangible plan was a huge hurdle for most people. That's all changing thanks to a new wave of AI‑powered interior design tools.
A New Era in Designing Your Space
Whether you're a homeowner, a professional designer, or a real estate agent, the power to generate stunning, photorealistic redesigns in a matter of seconds is a genuine game-changer. This isn't about slapping a filter on a photo. We're talking about sophisticated AI that understands the actual architecture, lighting, and layout of your space, delivering a preview that’s incredibly true-to-life.
This shift is happening fast. The market for these tools is exploding, expected to jump from roughly USD 1.47 billion in 2024 to an incredible USD 6.96 billion by 2032. That's a compound annual growth rate (CAGR) of 21.51%, which tells you just how quickly people are embracing this technology.
So, How Does This Actually Make Design Easier?
Instead of fumbling with complex software or pinning endless images to a mood board, you get instant visual feedback. These tools handle the heavy lifting, automating technical tasks and even suggesting creative directions you might not have considered.
Here’s what that means for you:
- See It, Believe It: Instantly test drive different styles—from sleek modern to cozy Japandi—in your own room.
- Design on a Dime: Experiment with thousands of ideas without the cost of hiring a pro for those initial concepts.
- No Experience Needed: The best platforms have simple, intuitive interfaces. If you can upload a photo, you can design a room.
The real magic of these tools is how they close the gap between an idea in your head and a visual you can actually use. They take the guesswork—and the financial risk—out of big design decisions, making the whole process less stressful and a lot more fun.
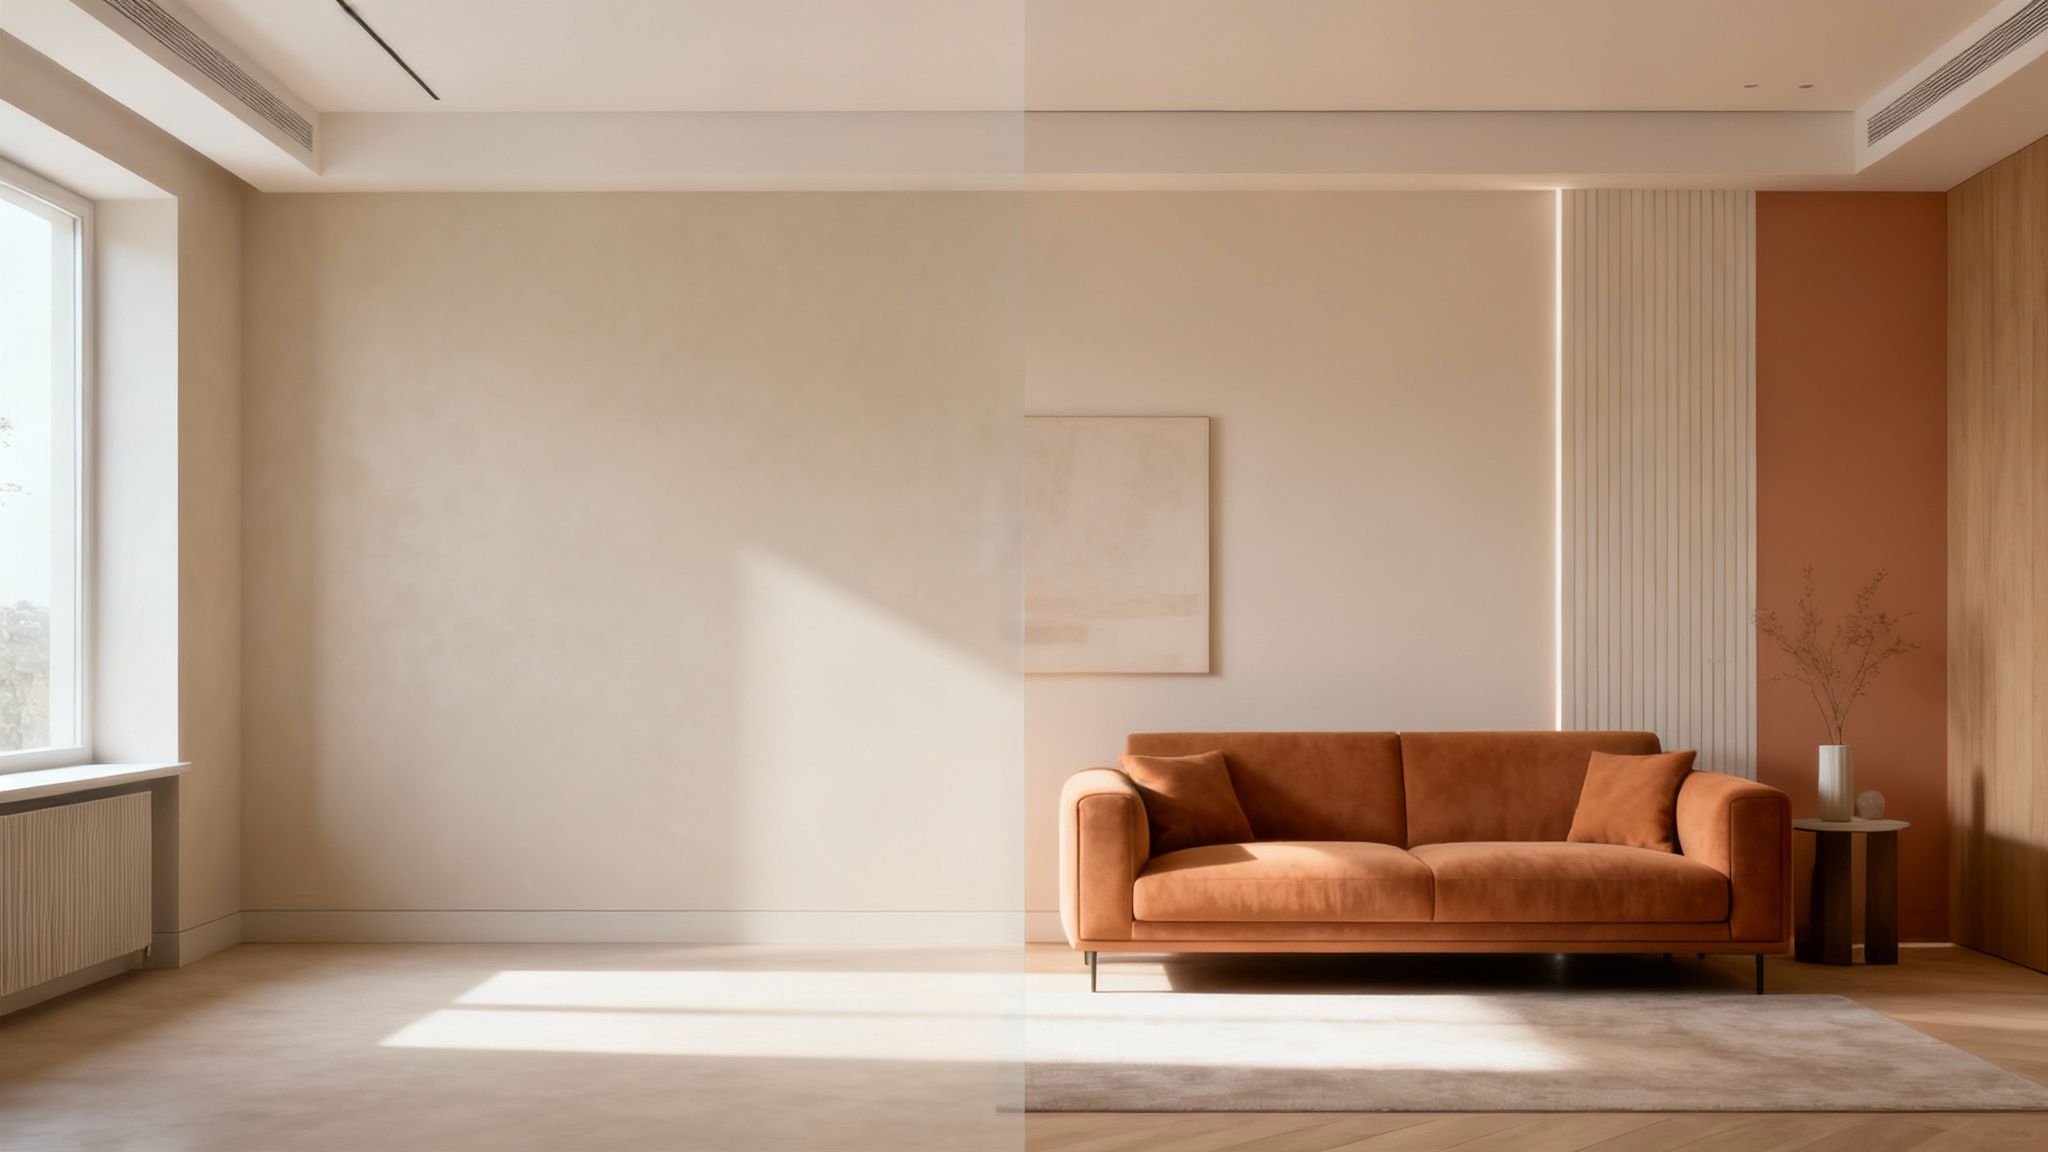
Tools like RoomStudioAI are pushing the boundaries even further. Imagine digitally emptying a cluttered room to start with a clean slate, or turning a rough napkin sketch into a fully rendered concept. This guide will walk you through exactly how to tap into these capabilities to bring your own design visions to life.
Preparing Your Space for Its AI Makeover
The old saying "garbage in, garbage out" has never been more true than with AI design tools. The quality of your final renders hinges entirely on the quality of the photos or sketches you start with. Think of your input image as the foundation of a house—if it's weak, the whole structure will be compromised. A little prep work up front makes all the difference.
You want to give the AI a crystal-clear understanding of your space. This means capturing the room’s layout, lighting, and unique architectural details as accurately as you can. The AI uses this information as the canvas on which it paints your new design.
Capturing the Perfect "Before" Photo
Whenever you can, shoot in natural daylight. Bright, indirect sunlight is your best friend here, as it minimizes harsh shadows and shows the true colors and textures in the room. This gives the AI the most honest data to work with.
For the best perspective, I always recommend standing in a corner. This trick of the trade lets you capture as much of the room as possible in a single shot, giving a much better sense of the overall layout. Just make sure to keep your camera level to avoid wonky, distorted proportions.
Pro Tip: Don't forget to use the highest resolution setting on your camera or phone. A sharp, detailed image allows the AI to pick up on the little things—like window frames, crown molding, and even electrical outlets—which leads to a far more believable and integrated final design.
Now, what about clutter? If the room is filled with furniture, you have a couple of options. You can either spend the time clearing everything out manually, or you can find a tool that does the heavy lifting for you. Some platforms, like RoomStudioAI, have an "empty room" feature that digitally removes all the existing clutter. It's a massive time-saver, giving you a blank canvas to work with instantly. You can see more on how this works for professional interior design projects and how it simplifies the entire initial setup.
From Napkin Sketch to Photorealistic Render
What if you're designing a space that doesn't even exist yet? No problem. Many AI tools are surprisingly good at interpreting hand-drawn sketches.
If you go this route, simplicity is your best friend. Use a dark pen on plain white paper and focus on clean, distinct lines. Your goal is to outline the basic shape of the room and mark the locations of key features like doors and windows. Don't get bogged down in shading or artistic details—that can actually confuse the AI. The system is looking for the architectural blueprint, not a piece of art.
A clean, simple sketch empowers the AI to build a structurally sound and realistic 3D space from the ground up.
To make sure you’re providing the best possible input every time, I've put together a quick checklist. Following these guidelines will dramatically improve the quality of your AI-generated renders, whether you're starting with a photo or a sketch.
Input Checklist for Optimal AI Renders
| Element | Best Practice for Photos | Best Practice for Sketches |
|---|---|---|
| Lighting | Shoot in bright, natural daylight to avoid harsh shadows. | Not applicable—just ensure high contrast. |
| Angle | Stand in a corner for a wide, comprehensive view of the layout. | Provide a flat, top-down, or clear perspective view. |
| Clarity | Use the highest resolution setting; make sure the image is crisp and in focus. | Use a dark pen on a plain white background; keep lines clean and simple. |
| Content | Tidy up the space or use a digital "empty room" feature for a clean slate. | Only draw essential architectural elements (walls, doors, windows). |
Getting this first step right is 80% of the battle. A great input image sets the stage for a great result, saving you a ton of time on revisions later.
Bringing Your First Design Concepts to Life
Alright, you've got your high-quality photo ready to go. Now for the fun part. This is where we stop planning and start creating, using AI-powered interior design tools to see what’s actually possible in your space. Forget abstract mood boards for a moment; we're talking about generating concrete, tangible concepts that you can see in your own room almost instantly.
The real advantage here is speed. You can churn through dozens of ideas in the time it used to take to find a few inspiration images.
For professionals, this is a game-changer. Take a real estate agent trying to market an empty apartment. Instead of paying for physical staging in a single style, they can produce multiple, completely different looks in under 60 seconds. One click gets them a sleek, Modern render. The next click transforms the same room into a calming, minimalist Japandi space. Another could show off a breezy Coastal theme. Suddenly, they're not just selling a vacant property; they're showing three different potential homes to three different types of buyers.
Choosing a Style and Iterating on the Vision
Actually generating the design is surprisingly simple. With a tool like RoomStudioAI, you’re basically just picking a style from a list and hitting "go." The AI takes over, applying the right materials, color palettes, and furniture archetypes to your room while respecting its unique layout and lighting.
To get those stunning results, you need to give the AI a great starting point.
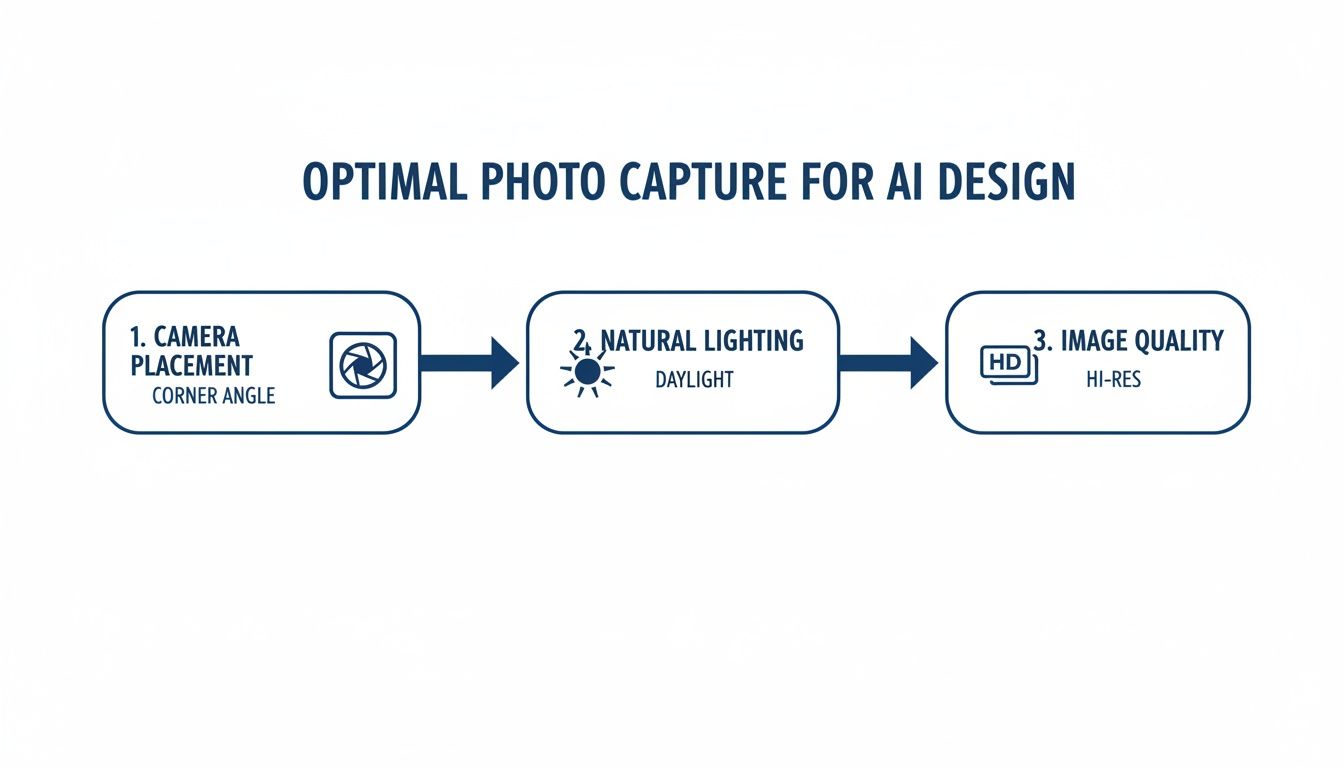
This simple three-step process—shooting from a corner, using natural daylight, and ensuring a high-resolution image—is the foundation for accurate and beautiful AI renders.
Think of your first render as a draft, not a final product. This is where the real creative work begins. Maybe you like the Japandi idea but the color scheme feels a little too washed out. You can regenerate it, this time adding a quick text prompt like "add sage green accent pillows" to nudge the AI in a more specific direction.
I always tell my clients to try styles they think they’d hate. It’s amazing how many times someone who was set against an industrial or rustic look completely changes their mind once they see how it could actually work in their space. Use this as a discovery tool.
Navigating the AI Design Workspace
You don't need a background in 3D modeling or graphic design. Most modern AI tools are built to be incredibly intuitive.
The layout is usually clean and straightforward, often with a side-by-side comparison of your original photo and the new AI concept. All the main controls—like selecting a room type or design style—are right there in plain sight. It feels less like operating complicated software and more like having a creative dialogue with a very fast assistant.
This initial stage is all about exploration and generating a wide range of high-quality visuals. Once you have a few concepts you love, you've built the perfect foundation to start refining the details into a polished, final design. Want to see it in action? You can generate a few concepts yourself and get a free AI interior design to test the waters.
Refining Your Renders and Shopping the Look
That first AI-generated render is always a thrill. You’ve gone from a blank canvas to a tangible concept in seconds. But don't mistake this first image for the finish line—it's actually the perfect starting point for getting the design just right.
This is where your designer's eye comes in. Take a hard look at what the AI produced. Does that velvet couch give you the cozy vibe you were after? Is the modern coffee table a little too severe for the space? Pinpointing these details is exactly how you’ll guide the AI toward something even better.
Iterating Toward Your Perfect Space
The beauty of this process is that you don't have to start over. Instead, you refine. Most AI-powered interior design tools are built for this kind of back-and-forth. Let's say you love the overall "Coastal" style it generated, but the wood tones feel too light. Your next move might be to add a simple phrase like "with a dark oak media console" to your prompt.
Think of it as a conversation with your design assistant. You aren't just hitting a button; you're actively directing the creative flow with specific, targeted feedback. If you're designing a workspace, for example, our guide on home office ideas can give you some great language to use for more precise results.
Don’t hesitate to regenerate a design three, four, or even ten times. Each iteration refines the vision and gets you closer to a final look you love. This rapid, no-cost experimentation is one of the biggest wins of using AI.
Turning Inspiration into Action
What’s the point of a gorgeous render if you can’t actually create the room? For years, this was the frustrating gap between digital concepts and reality. You’d fall in love with a chair in a design, then waste hours trying to find something—anything—like it online. Today's best platforms are finally solving this problem.
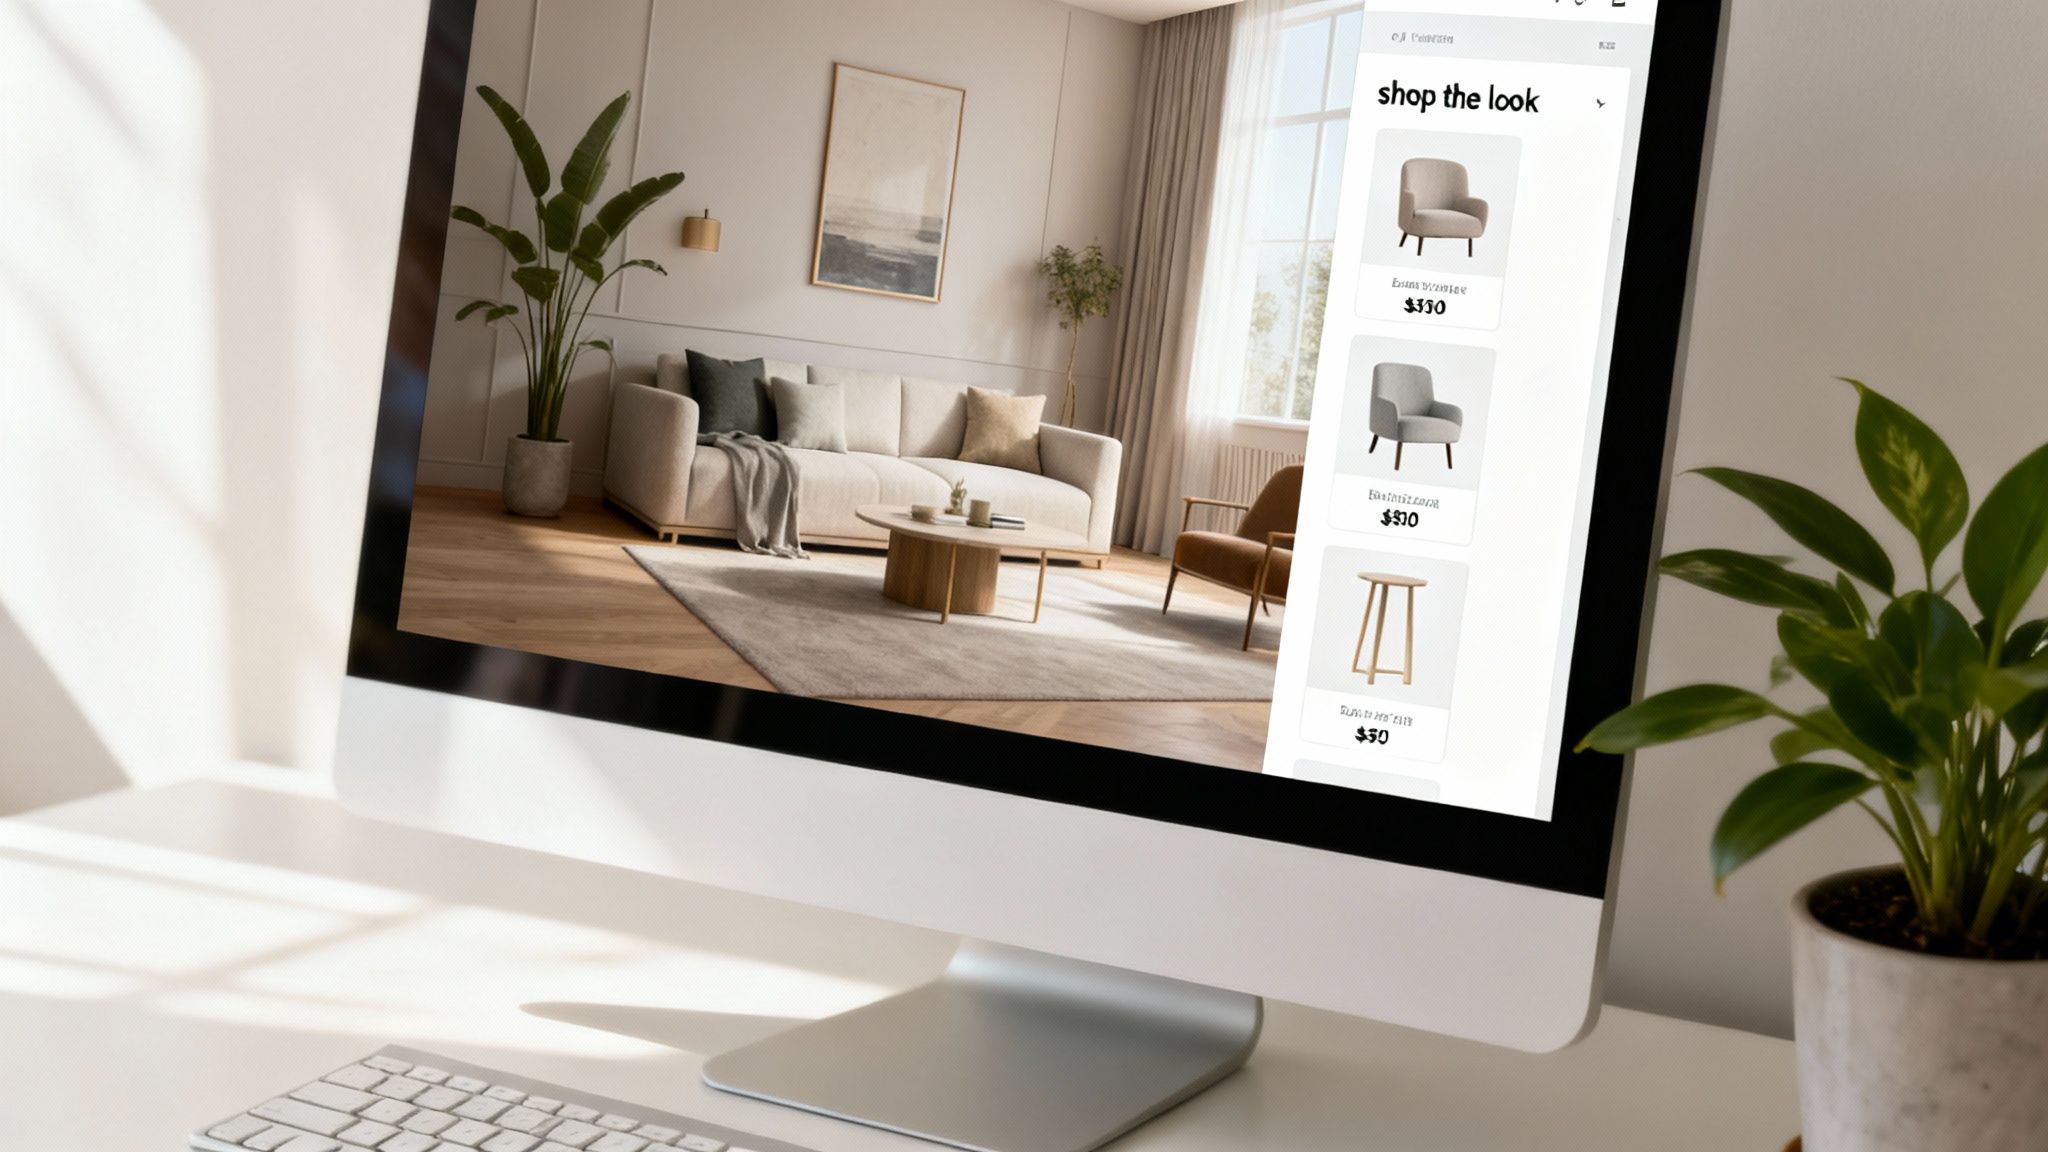
Many tools now come equipped with a "shop the look" or visual search feature. This is the game-changer. The technology scans your render, identifies the individual pieces of furniture and decor, and then shows you real, shoppable products that match. It’s a direct bridge from digital dream to physical reality.
How "Shop the Look" Actually Works:
- Item Identification: The AI recognizes every distinct object in your image, from the floor lamp in the corner to the throw pillow on the sofa.
- Visual Search: It then combs through catalogs from retail partners to find visually similar products that are actually for sale.
- Direct Purchase Links: Finally, it gives you direct links to buy those items, completely eliminating the guesswork of sourcing.
This turns your render from a static image into a personalized, interactive shopping list. It ensures your vision doesn't just stay trapped on a screen but can be brought to life in your home, efficiently and accurately. It’s the final, crucial step in making your design a reality.
Bringing Your Vision to Life: Collaboration and Exporting
Once you’ve nailed down a set of refined renders, your AI-powered interior design tool shifts from a creative sandbox into a serious business asset. This is where the magic happens for interior designers, real estate agents, and marketing teams—the point where AI starts streamlining presentations, closing deals, and moving properties faster. You’re no longer just creating; you’re communicating a professional vision.
Think about it from a designer's perspective. You've finalized a few concepts for a client. The old way involved exporting static images, dropping them into a slide deck, and hoping for the best. Now, you can generate a private, shareable link to the entire project right from a platform like RoomStudioAI. This gives your client a dynamic, interactive space to explore the designs, leave comments directly on the images, and feel genuinely involved in the process.
Presenting AI Concepts to Clients
When you share these visuals, it's crucial to set the right expectations. I always tell my clients to think of the AI renders not as a final, unchangeable blueprint, but as a high-fidelity "visual brief." It’s our shared starting point—a way to get on the same page about style, mood, and layout before anyone starts spending money on furniture or labor.
This completely changes the conversation. You’re not just describing an idea; you're showing it in stunning detail. This visual proof point builds incredible confidence and helps clients make decisions faster and with more certainty. The goal isn't just to show a pretty picture, but to use that picture to sell your expertise and get buy-in on your vision.
The industry is clearly moving in this direction. Professional-grade software now makes up over 65% of the AI interior design market, and interior designers are the single largest user group at 40.10%. It’s a testament to how these tools are being built specifically for professional workflows. For a deeper dive, check out the latest data on the AI interior design market from market.us.
Exporting High-Resolution Assets for Maximum Impact
For any kind of marketing or property listing, image quality is everything. A grainy, pixelated photo can instantly devalue a property in a buyer's mind. That’s why the ability to export in high resolution—up to 4K—is a must-have feature for any serious professional.
These crisp, photorealistic images are perfect for:
- Digital Marketing: Elevating your website, social media feeds, and email newsletters.
- Print Materials: Creating beautiful, high-quality brochures, flyers, and physical mood boards.
- Property Listings: Making your listing pop on Zillow or Redfin with perfectly staged photos that grab attention.
One last, crucial point: make sure you have the right license for commercial use. Always check that your subscription plan covers business applications. Plans like RoomStudioAI’s Pro and Enterprise tiers are built for this, giving you the legal rights to use the images in your commercial projects without any headaches. It’s the final step that protects your business and lets you fully monetize your AI-powered designs.
Understanding the Investment: AI Design Tool Plans and Pricing
Once you've moved past the initial excitement and are ready to make an AI tool a core part of your design workflow, the conversation naturally turns to cost. When you start looking into professional-grade AI interior design platforms, you'll find a few different pricing models out there. Figuring out which one works for you is crucial for keeping your projects on budget.
Credit Packs vs. Predictable Subscriptions
A lot of tools use a credit-based system. You purchase a block of credits, and every time you generate a render or perform an action, it deducts from your balance. This might sound flexible, but it can make your monthly expenses wildly unpredictable. During a busy design sprint with lots of revisions, it's easy to burn through credits faster than you expected, forcing you to ration your work at the worst possible time.
This is where a straightforward subscription model really shines.
A platform like RoomStudioAI keeps things simple with monthly plans. You pay one flat fee and get a specific number of high-quality renders each month. This kind of predictability is a massive relief, whether you're a homeowner trying to stick to a reno budget or a professional designer who needs reliable access without constantly checking a credit balance. You know exactly what you get for your money, every time.
When you're comparing plans, don't just stop at the number of renders. Dig a little deeper into the features that really matter for professional use:
- Commercial Usage Rights: This is a big one. Does the plan give you the legal green light to use your renders for business, like in a client portfolio or on a real estate listing?
- Export Quality: Can you download your images in high resolution, like 4K? For any kind of professional print or digital marketing, anything less is a deal-breaker.
- Collaboration Tools: Is there a way to easily share projects and gather feedback from clients or team members directly within the platform?
These are the kinds of features that separate a fun hobbyist tool from a serious professional solution. You can see a full comparison of these features on RoomStudioAI's pricing page.
Getting the Best Results (and What to Do When You Don't)
Even the most advanced AI tools can produce an odd result now and then. If a render comes out looking a little off, don't worry—it happens. It's just part of the iterative process.
When an AI-generated image doesn't hit the mark, your first move should be to look at your source material. Was the original photo clear and well-lit? Was it taken from a good, straight-on angle? A blurry, dark, or oddly angled photo is almost always the reason for a disappointing render. If you're using text prompts, try adding more detail. Instead of just "modern sofa," try "a low-profile modern sofa in a light gray bouclé fabric." Specificity is your best friend.
Key Takeaway: The quality of what you get out is directly proportional to the quality of what you put in. Spending an extra minute or two prepping your source image or refining your prompt will save you a ton of time and frustration later.
The market for these design tools is expanding incredibly fast. In fact, some analysts predict the industry will grow to USD 7.2 billion by 2033, largely thanks to the rise of generative AI platforms serving everyone from residential designers to commercial real estate firms. As the technology evolves, getting these simple best practices down will put you in a great position to consistently create stunning, client-ready designs. You can find more detail on the AI interior design tools market growth on htfmarketinsights.com.
Ready to see it for yourself? With RoomStudioAI, you can turn any photo of a room into a stunning, photorealistic design in less than 30 seconds. Start creating for free today!
Ready to redesign your space?
Try our AI interior design tool and see your room transformed in seconds.
Try Free Design

